I'm baaaack! College is finished and life can begin again!
I mean, college has been finished for a while. But it's been so long since I did any work to any of my projects that I had completely lost interest in them. I've spent most of my free time working on a book, and as well as writing that because I enjoy writing it, I'm also driven by the fact that I fully intend on getting it published and making some money from it. It's a means of income. And thinking about that made me realise that there isn't really anything productive I do anymore that I just do because I want to. So I've decided to start working on my wall climbing gloves again.
And what a productive day it has been! I only worked on them for a couple of hours, but in that time I've been able to get a fully functional contraption for one hand! And it looks so much better than the old versions (which I threw out). Here's a photo:
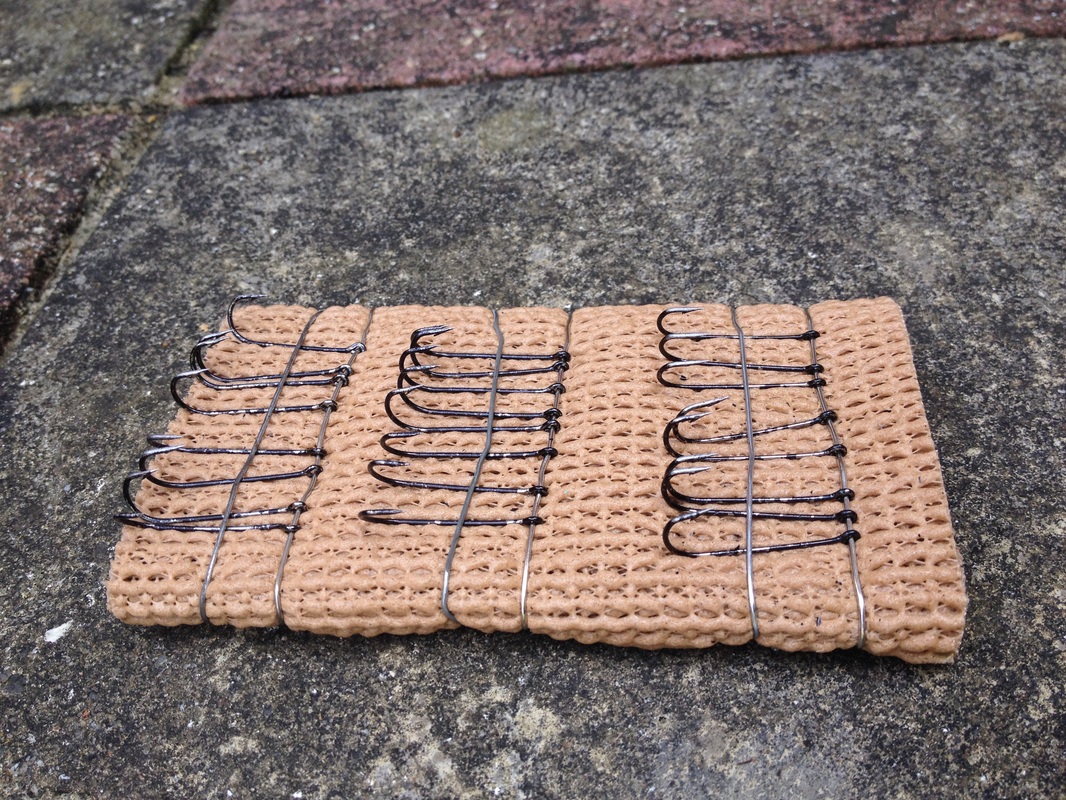
See those lovely fish hooks? See how nice and pointy they are? See the absence of any silly paper mache or ugly pieces of ice lolly sticks? See all that nifty metal? Yeah... I much prefer this design.
So as I said all those months ago, I've moved onto fish hooks over my homemade hooks. As you can see in that photo, they are much pointier. However, they are also not nearly as strong. Hopefully that won't be a problem. They come with tiny rings on the other end, as you can see, which are incredibly useful. Unfortunately, the rings face the wrong way (across the direction the hooks are pointing), but it wasn't too difficult to use two adjustable spanners to twist them round (which, let's be honest, has probably made them more brittle).
Rather than gluing the hooks to the board, like last time, I've simply attached them to a metal rod. This means that all I have to do is attach the rod to the board. As it is, I've had to use a paper clip as the metal rod. Simply bending the ends of the paper clip around the sides of the board, as in the picture, seems to keep it firmly in place (though it may not turn out to be firmly enough). The strange material you can see that has also been wrapped around the board is just some material I had in my arts and crafts box - I don't know what it's called. The reason I've used it is so that the hooks are not rigidly pressed against the back of the board, as with the other design. The hooks on that previous version couldn't move at all; they were completely solid. But with several layers of this soft material behind them, then - given that they can easily rotate about the metal rod to which they are attached - each one can move back slightly. This means that, when I press the board into the wall, all the hooks will be able to move back as much as they need until all the hooks have touched the wall. At least, that's the idea. This should hopefully mean that I won't encounter the problem I had with the old design, where only four or five hooks were actually able to touch the wall and get a grip. The extra rod (paper clip) on each of the rows of hooks is to prevent them from falling forward, which is obviously undesirable.
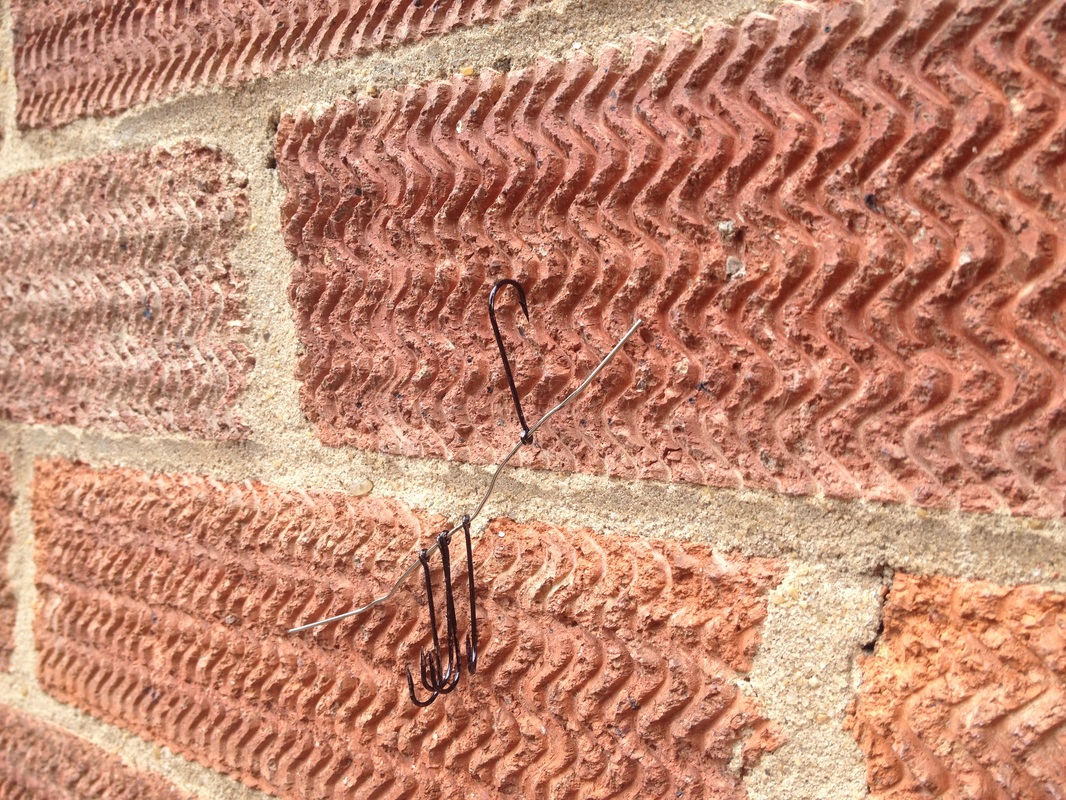
Here is a photo of the very early stages, showing just one hook clinging onto the wall:
So as I said all those months ago, I've moved onto fish hooks over my homemade hooks. As you can see in that photo, they are much pointier. However, they are also not nearly as strong. Hopefully that won't be a problem. They come with tiny rings on the other end, as you can see, which are incredibly useful. Unfortunately, the rings face the wrong way (across the direction the hooks are pointing), but it wasn't too difficult to use two adjustable spanners to twist them round (which, let's be honest, has probably made them more brittle).
Rather than gluing the hooks to the board, like last time, I've simply attached them to a metal rod. This means that all I have to do is attach the rod to the board. As it is, I've had to use a paper clip as the metal rod. Simply bending the ends of the paper clip around the sides of the board, as in the picture, seems to keep it firmly in place (though it may not turn out to be firmly enough). The strange material you can see that has also been wrapped around the board is just some material I had in my arts and crafts box - I don't know what it's called. The reason I've used it is so that the hooks are not rigidly pressed against the back of the board, as with the other design. The hooks on that previous version couldn't move at all; they were completely solid. But with several layers of this soft material behind them, then - given that they can easily rotate about the metal rod to which they are attached - each one can move back slightly. This means that, when I press the board into the wall, all the hooks will be able to move back as much as they need until all the hooks have touched the wall. At least, that's the idea. This should hopefully mean that I won't encounter the problem I had with the old design, where only four or five hooks were actually able to touch the wall and get a grip. The extra rod (paper clip) on each of the rows of hooks is to prevent them from falling forward, which is obviously undesirable.
Here is a photo of the very early stages, showing just one hook clinging onto the wall:
The quick prototype:

And this, finally, is a picture showing the final product clinging to the wall:
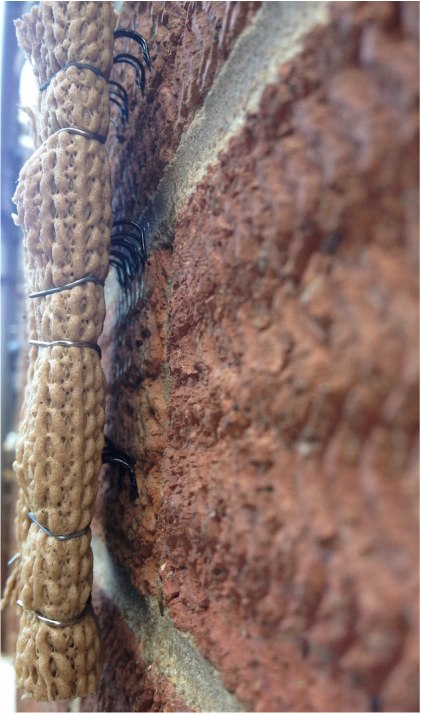
It was so cool having this thing that I could just pick up and place pretty much anywhere on the wall and it would just stay there. It was so cool that I thought about doing a video of it, but then... I couldn't be bothered.
So anyway, I'll try to make the one for the other hand tomorrow, and if I do, then I can try it out! To be honest, it probably won't be able to hold my weight, but at least this design is so much easier and quicker to make and adjust, so it won't be such a big deal if I need to add more hooks or something.
So anyway, I'll try to make the one for the other hand tomorrow, and if I do, then I can try it out! To be honest, it probably won't be able to hold my weight, but at least this design is so much easier and quicker to make and adjust, so it won't be such a big deal if I need to add more hooks or something.
 RSS Feed
